While standing is the most popular way to take photographs, it is not the only option. Other positions that you could try include kneeling, crouching, or lying down. All of these positions are acceptable for taking photos of people, but some will require you to hold the camera closer to your face. Here are some tips when choosing which position to use. Then you'll have no trouble composing your shots!
Standing technique
To take pictures from the side you should lean on an object solid enough to support your camera and extend your arms. Your center of gravity will be found by leaning against a solid object. This will allow you to have the best stability and minimize movement. You can also stand on a firm surface if your camera strap is attached. To ensure the best stability, you should place your camera on the arm above the head.
Crouching
Crouching to hold your camera offers many advantages. Crouching is much more stable than kneeling down or standing on your elbow. Even though the elbow is inherently unstable, resting the elbow on your knee will help you to stabilize the camera and minimize camera shake. These are just a few reasons why crouching to keep a camera steady is better. Let us take a closer look at each.
Kneeling
Most photographers rest their elbows upon a hard surface, rather than crouching down or kneeling in order to hold a digital camera. While it may not be the most stable position for a photographer, it is safer than resting your elbow against your knee. Gunners use the same technique to improve their stability. This technique allows the photographer to adjust their camera and lens without losing stability. If terrain is difficult or impossible to reach, kneeling is a great option for outdoor photography.
Lying down
When you are shooting a video, you may wonder whether lying down to hold camera is the best position. The answer is yes, but it requires a little practice. Your center of gravity should be lower when you sit than when your are standing. It will also give you more stability than standing. You must keep your arms and legs straight while taking video. When sitting, your left hand will press down the camera as you shoot, while your right will support it as you move.
With your elbows tucked into
To minimize camera shake, tuck your elbows in your body. You can hold your camera more securely and use a slower shutter speed by doing this. You can also rest your elbows on an object to stabilize your camera. This will prevent the camera from shaking, and it will also keep your arms from becoming tired or sore.

With legs lifted
The triangle pose is a popular choice for photos on social media. It is where one leg is straight and the legs are separated at each knee. The hand is at the hip. The bent leg should appear natural in a real-life photo. Girls who place too much weight on their wrong feet can ruin these photos. These tips will help you create a photo that looks natural. Aside from the legs being separated, the camera should also be positioned centered.
FAQ
Which is the best camera to use for beginners?
The best camera choice for beginners is determined by your budget, skills, and needs.
For example, if you're looking to save money, you might choose a point-and-shoot digital camera. These cameras are not very versatile but offer excellent quality.
Digital Single Lens Reflex (DSLR) cameras can be equipped with interchangeable lenses that enable you to shoot different types. These lenses are usually more expensive than point-and shoots, but offer greater flexibility.
A beginner's package is a great way to get started in photography. Everything you will need, including a tripod, flash, memory cards and lens, can be found in one package.
Do not forget to get extra batteries!
Where to Buy Cameras?
You can find many places online to buy cameras. We recommend purchasing from a trusted retailer such as B&H Photo Video. They have knowledgeable staff that can help answer any questions you may have.
B&H ships your order quickly and securely.
This video will help you learn more about buying cameras.
What camera should I get?
It all depends on your goals and what type of photographer you are. A basic point-and-shoot camera is probably all you need if you're just starting out.
However, once you've mastered the basics, you'll likely want something more advanced. Personal preference is the only way to decide.
Here are some things to consider before purchasing a camera.
-
Features: What features do you need? Will you use manual settings or autofocus? How many megapixels do you have on your camera? Is there a viewfinder on your camera?
-
Price: How much are you willing and able to spend on your camera? Are you planning on upgrading your camera every two years?
-
Brand: Is it possible to be happy with your brand choice? There is no reason to settle for less than the very best.
-
Functionality: Can your camera work in low-light conditions? Can you take high resolution photos?
-
Image Quality - How clear and sharp is your image quality?
-
Battery Life: How much time will your camera last without needing to be recharged?
-
Accessories: Will you be able to attach additional lenses, flashes, etc. ?
Is photography a talent
Photography is not a talent but an art form that requires practice, training, and experience. The art of photography requires years of practice and dedication to mastery.
Photography is a business, and you should have a plan on how you're going to make it profitable.
To achieve this, it is important to first understand the kind of clients that you wish to attract and then find ways to reach them.
You must understand their motivations and who they are. To convince them to purchase your services, you need to be able to communicate clearly.
This means that you will need to be well-organized and prepared when you meet potential clients.
When you are ready to approach potential customers, you will need to create a portfolio of your work. You can either create a portfolio digitally with software programs, or print it on paper.
After creating a portfolio you should look for opportunities to present it. This could include advertising online or directly approaching businesses.
How can I learn how to photograph on my own.
There are many methods to learn how you can take amazing photos. There are many options: you can buy a book, take a class or join an online community. You can also watch YouTube tutorials. You can't go wrong with doing it yourself if you are serious about mastering the art of photographing. You have full control over the final product. And you'll continue to improve as long you keep learning.
In fact, one of the best things about digital photography is that you don't even need expensive equipment. All you need is an internet connected computer and a camera. The rest is up to you.
Here are some ways to get started.
-
Get familiar with your camera's manual settings.
-
Learn how the basic controls work.
-
Take lots of photos.
-
Make sure to edit them.
-
These are yours to share.
-
Keep practicing.
-
Experiment.
-
Take a look at the world from different perspectives.
-
Use light sources creatively.
-
Practice makes perfect.
-
Do not be afraid to fail.
-
Be patient.
-
Have fun!
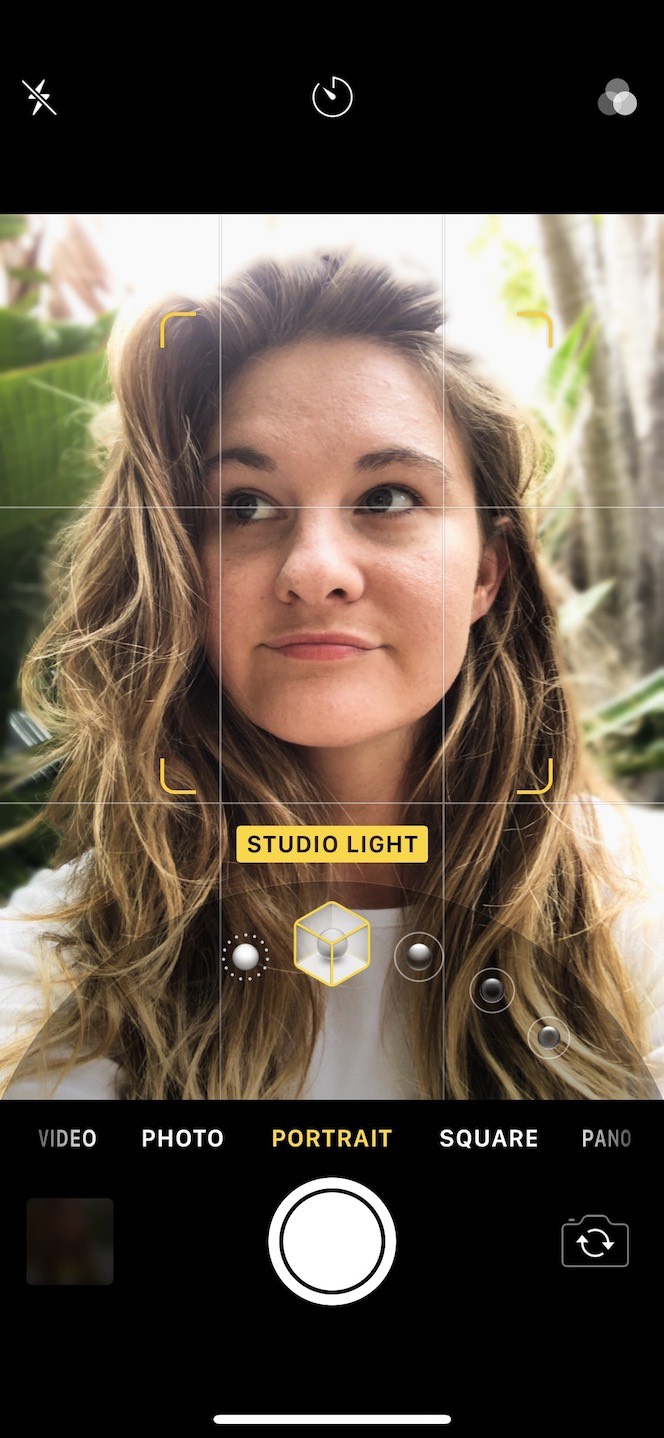
What is the rule to thirds in photography
The rule of Thirds allows you to create unique compositions with minimal camera settings. It divides your photo into nine equal parts horizontally as well vertically. It creates three main areas, where your subject should appear. These are the top (3rd from the left), middle (3rd from center) and bottom (3rd from lower right). You can use these areas as guides for positioning your subject within your frame.
The rule of threes can also help you avoid placing important items too close together. You might not have enough space between them for a strong visual impact if you put them close together. If you put them too far apart, they might lose focus because there isn't much room around them.
Is digital photography hard?
Digital photography isn't as simple as you might think. It takes time to master the tools. To be able to take different types of shots, you must know what settings are appropriate. It is best to practice what you have learned. Practice makes perfect.
Statistics
- Get 40% off Adobe Creative Cloud(opens in new tab) (creativebloq.com)
- That's the easiest way to get blurry photos 100% of the time. (photographylife.com)
- While I cannot prove that all of those spots were not sensor dust, the photo was taken during a heavy snowstorm…so I guess that 99.8% of the spots are snowflakes. (bhphotovideo.com)
- This article received 13 testimonials, and 100% of readers who voted found it helpful, earning it our reader-approved status. (wikihow.com)
External Links
How To
How to take pictures in low lighting conditions
Low-light Photography is when you take photos in dimly lit or dark environments. It requires special equipment. The main challenges in this field include controlling exposure, whitebalance, and sharpness. There are two types of low light photography: flash and ambient. Flash photography works well when there is sufficient light around you. A flash is required if there isn’t enough light. Without a flash, it is possible to get a poor picture if the subject is indoors and not outdoors. A flash is not necessary if you aren't interested in shooting at night with the moonlit hours. This will give you some beautiful shadows and colors. Another option is to capture at twilight. Twilight happens when the sun has set but there is still daylight.
You might also be interested in long exposures. Long exposures let you capture images even after the shutter has been open several minutes. When the shutter remains closed, the camera records only light that falls on the sensor. This light continues to fall onto a photo sensor throughout a prolonged exposure. The shutter is still closed so no light can enter the lens. You will see very little movement as a result. To ensure a clear image, you should turn off all automatic settings such autofocus or exposure. Make sure to adjust the ISO setting before starting to shoot. An ISO setting of 200 gives you more flexibility to control how bright or dark your image looks. The shutter button should be pressed quickly when you are ready to take the photo. This will bring the shutter completely to a close. Next, hold the shutter button down until the end. You will prevent additional light from entering your camera by keeping the shutter button down. Once you take the shot, wait a while before you release the shutter. This allows the camera to process the image. While the image is processing, you can see your photos on your computer monitor. Once you are satisfied, save them on your computer.