
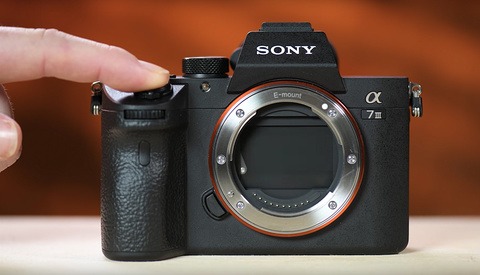
You must wait patiently for the right moment to capture great wildlife photos. It takes patience to take great wildlife photos. However, you will also need a camera and lenses. It is important to spend time learning how to use the camera's features such as ISO, shutter speed, aperture and ISO. These settings can help you create beautiful wildlife photographs. These tips will help you capture stunning wildlife photos.
Do's and don'ts of photographing wildlife
There are a few basic do's and don'ts to take when photographing wildlife. First, find a spot with good light and a good subject. You want action shots so make sure you choose a location with good lighting and composition. You should avoid taking photos of endangered or rare animals. Also, think about your focal length. For dramatic shots, you can experiment with shorter focal lengths. Wildlife photography is usually done using long focal lengths.
You should be positioned between the sun and the subject
The best way to photograph wildlife is to position yourself between the subject (and the sun) in order for the best results. It is best to position yourself between your subject and the sun, so that your shadow falls directly on your subject. Double-checking your position is a smart idea. Before you leave the house, make sure to look into the sun. Alternatively, you can position yourself so that your shadow is pointing toward the subject. Plan your route ahead of time to ensure you are in the best spot relative to the sun.
Use a telephoto zoom lens
It takes special equipment and knowledge to use a telephoto zoom lens to take photographs of wildlife. These lenses can be quite bulky due to their long focal length. These lenses can be mounted on either a monopod, or a tripod. A tripod reduces camera shake so that the photographer can focus on the subject and not the camera. When photographing wildlife, a tripod is crucial. Depending on which lens it is, it may be from a few inches or three feet in length.
Get in touch with your subject
Although it is tempting to get too close to wildlife when taking photos, keep in mind your surroundings and the settings of your camera. Getting too close to an animal can stress it out and lead to a fatality. Small animals can also be sensitive to humans and react negatively when they are approached. Avoid stepping on any critters and avoid muddy puddles as this could put your photo shoot at risk.
Using a hide
A hide is a great way to photograph wildlife. These hides are often made from wood, so they can be durable and long-lasting. However, it is important to remember that hiding in a hide can attract a lot of attention from the animals around you. To avoid this, ask permission before setting up a hide. If you are unable to give permission, mount or frame images of your subjects. Use a compass and a map to check for light movement around your hide.
FAQ
Why use Light Room to enhance your pictures?
To ensure that you get the best photos for your project, it is best to start early. It's always a good idea to take as many pictures as possible and then decide which ones will be the most valuable.
This is possible because Lightroom lets you see how different settings affect each image. You can also adjust these settings on-the-fly without going back into Photoshop. This allows you to quickly test what looks great and what does not.
How can I become a professional photographer?
Photography requires patience, dedication, passion, and practice. Passionate about photography will make you do better than if it was just for the money.
You should learn how your camera works. You must understand composition, lighting, exposure, depth of field, etc. Additionally, you should have a good grasp of Photoshop.
It is hard to master photography, but it is worth the effort.
If you want to improve your skills, then read books on the subject, attend classes and take part in competitions. You'll gain experience and confidence which will lead to further improvement. What equipment are you looking for?
It all depends on the type of photography that you are interested in. If you're interested in landscape photography, for example, you'll need a wide-angle lens.
A telephoto lens is essential for portrait photography.
Photographers need a tripod. It allows you stand up and compose your photo without moving.
Camera bags can be useful for carrying your camera and memory cards as well as other accessories.
If you are using a compact lens, a flash is needed.
A DSLR (Digital Single Lens Reflex) camera is by far the best choice for beginners who want to take professional quality photos.
DSLRs are popular because they allow you to control every photo aspect, including shutter speed, aperture, ISO sensitivity, white balance, focus, and more. You also have the option to use autofocus, autoexposure lock and self-timer.
Do I Need A Tripod?
This is one question that everyone wants to know. While a tripod may not be necessary all the time, it can prove to be extremely useful.
A tripod allows you to stabilize your camera when taking photos at slow shutter speeds. A tripod is a great option for landscapes and other stationary subjects.
However, tripods can blur the images of moving subjects like sports and people. So, how do you know which situations require a tripod?
A tripod can be useful in any situation where you need to capture fast action or stationary subjects. Examples include:
-
Sports
-
People
-
Landscapes
-
Close-ups
-
Macro shots
You can use this test to determine whether you need a tripod. Take your camera and hold it still. Then, look through the scope. If you see blurred lines or movement, then you definitely need a tripod.
If you don’t see blurring, adding a tripod is unlikely to make any difference.
However, if you do decide to invest in a tripod, here are some tips to keep in mind.
-
Smooth legs are important for tripods. This helps to prevent vibrations from shaking the camera.
-
Choose a sturdy tripod. Some tripods can be made out of plastic but they are not very durable. Look for a metal tripod instead.
-
Consider purchasing a remote release. This remote control lets you remotely control your camera. Once you press the button, it will automatically fire the shutter.
-
Look for a tripod that has a 360-degree rotating head. It makes it easy to position your camera horizontally or vertically.
-
Be aware that tripods are not cheap. Expect to pay $100-200. However, you'll get a lot of value for your money.
-
Accessories like memory cards and filters should not be forgotten.
-
Before buying online, check with your local store. Many retailers offer free shipping.
-
To find out what customers think about a product, read reviews.
-
Ask family and friends who have similar products.
-
You can learn from customers' experiences by visiting message boards and forums.
-
Search online for user reviews.
-
Use websites like Amazon.com to compare prices and read customer feedback.
-
See photo galleries to see some of the creative uses for tripods by photographers.
Statistics
- That's the easiest way to get blurry photos 100% of the time. (photographylife.com)
- By March 2014, about 3 million were purchased monthly, about 30 percent of the peak sales total. (en.wikipedia.org)
- This article received 13 testimonials, and 100% of readers who voted found it helpful, earning it our reader-approved status. (wikihow.com)
- The second easiest way to get blurry photos 100% of the time is to use a cheap filter on the front of your lens. (photographylife.com)
External Links
How To
How to use Lightroom for Photography
Adobe Lightroom can be used by photographers to easily edit photos. It allows you upload your images to one place that can be viewed as well as edited, cropped, liten, and saved. You can share them online or print them.
Lightroom offers editing tools such as cropping, adjusting brightness and contrast, color balance and color balance. It also includes presets that allow you to apply common effects like vignette and lens distortion correction. This is the best thing about Lightroom: these adjustments are automatically applied when you export your images.
Adobe Bridge allows you to access Lightroom. This lets you view thumbnails and organize your files while browsing through your collection. You can also add keywords to images to make them easier to find later.
Start with the free Lightroom version if you are new to Lightroom. This version includes all the essential features. You have two options if you wish to upgrade: either buy the full version or subscribe.
Lightroom can downloaded in many ways. One option is to purchase the software directly from Adobe. Another way is to download the trial version and convert it to a paid license. Here's how to do that.
-
Lightroom Trial Version
-
Launch the program. Click "Convert to License" in the bottom right corner.
-
Choose the type of license you want (one year or perpetual) and enter your payment details.
-
Click "Continue" to complete the process.
-
Once the trial version has been converted to a paid licence, you can continue using the license until the end.